| Step-by-Step Instructions
RMA-2 (Return Authorization
Directory)
|
| 1. |
Directory
Procedures
- RA-1 RMA Transaction - Data Entry Screen
- RA-2 RMA Form - Print Un-Printed Return Authorizations
- RA-3 RMA Form - Re-Print a Return Authorization
- RA-4 RMA Reason Code - Data Entry Screen
- RA-5 RMA Listing - New RMAs - Waiting for Authorization
- RA-6 RMA Listing - Authorized RMAs - Waiting for Receiving
- RA-7 RMA Listing - Received RMAs - Waiting for Credit Memo
- RA-8 RMA Listing - Memo'd RMAs - Waiting for Sales Order
- RA-9 RMA Listing - Time Period Analysis - By Date
- RA-10 RMA Listing - Time Period Analysis - By Customer
- RA-11 RMA Listing - Time Period Analysis - By Inventory
- RA-12 RMA Listing - Time Period Analysis - By Reason
- RA-13 RMA Listing - Closed Prematurely
|
| 2. |
RA-1:
- Enter the Procedure RA-1 - it looks like the screen below
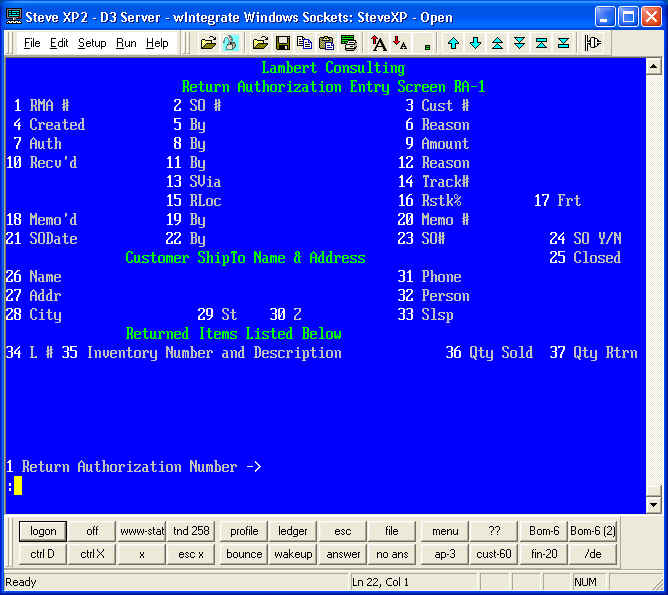
- Use the # command to generate a new RMA #. If you wish to
view/update an existing RMA, enter the RMA # here or use the ??
command to search for it.
- A Sales Order # is required for ALL RMAs. NOTE: In some cases you
sell product to dealers and they sell to end users. Returns may
come from the End User. In this case you MUST Create the End
User as a Customer (CUST-1) and you MUST Create a Sales Order. For each
product returned, enter it in the SO with a ZERO QUANTITY
ORDERED. Check Pricing of each product. File the SO with ALL
Quantities set to ZERO so the SO does not affect the Financials or
Sales Statistics.
- Once the SO is entered, the Cust #, ShipTo Name & Address,
Products and Qtys Sold will appear on the screen. NOTE:
In the special case where the End User made the return, the Qty Sold
will show ZERO.
- Fill in Fields 4,5 and 6 using your User Code, Date and Reason Code.
- Next Fill in the Qty Rtrn field. NOTE: The system will
NOT allow more qty returned than sold, except in the case where ZERO
qty was sold. As you do this, notice the Amount in Field 9
displays the Total Dollar Amount of the return. This is both an
informational and control field. If the total exceeds a preset
value (say, $300), then it must be authorized using the User's
Password. File the Item.
- To Authorize the RMA fill in Fields 7 and 8. File the Item.
- The next step is to receive the product from the customer.
Fill in fields 10-17. You will be entering the Date Received,
your User Code and the REAL Reason the Customer is returning
product. If the product needs to be return to a
"Repair" location, please enter that information here.
File the Item.
- At this point the product(s) are not yet back in stock, and we have
not yet put a credit on the customer's account. To do this, we
use the /CM command to Create a Memo. You must have
already filed the item and be at Field 1 to use this command.
After the command is entered, you will be taken to the Credit Memo
screen where you should review the information and file the
Memo. After this has been done you will notice that fields 18-20
have been filled in automatically. At this point the product(s)
are back in stock and a credit has been issued.
- Once the product(s) are repaired we will produce a NEW Sales Order
and Invoice. To do this enter /CS to Create a Sales
Order. Again you must be at field 1. You will be taken to
the Order Entry Screen (OE-1) and you will be asked to retrieve a
VOIDED SO. Answer Y and the Sales Order Image will be
displayed. Add any addition products (Labor, Replacement Parts,
etc.) and file the Sales Order and Create the Invoice. The Memo
and New Invoice will offset each other, except for the cost of repair
and replacement.
|
| 3. |
RA-2 &
RA-3 - The RMA Form:
- User these procedures to print a "hard copy" of the RMA
Form.
|
| 4. |
RA-4 - Reason Code Screen:
- Enter the Procedure RA-4 - it looks like the screen below
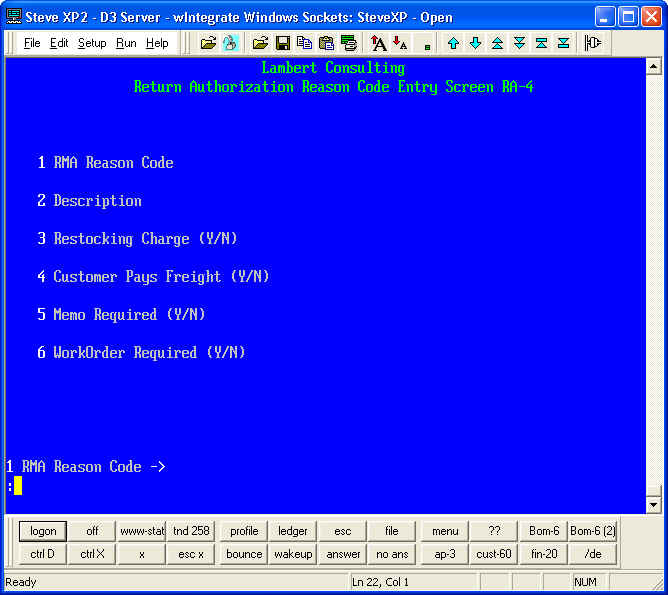
- Use the ?? command to view the list of current RA Codes. You may
add new Codes as needed. Fill in the Description and decide
whether Restocking Charges, Freight Payments, Memos and WorkOrders are
Required. File the Code. It is now ready to use in RA-1.
|
| 5. |
RA-5 - RMA Listing - New RMAs - Waiting for Authorization:
|
| 6. |
RA-6 - RMA Listing - Authorized RMAs - Waiting for Receiving:
|
| 7. |
RA-7 - RMA Listing - Received RMAs - Waiting for Credit Memo:
|
| 8. |
RA-8 - RMA Listing - Memo'd RMAs - Waiting for Sales Order:
|
| 9. |
RA-9 - RMA Listing - Time Period Analysis - By Date:
|
| 10. |
RA-10 - RMA Listing - Time Period Analysis - By Customer:
|
| 11. |
RA-11 - RMA Listing - Time Period Analysis - By Inventory:
|
| 12. |
RA-12 - RMA Listing - Time Period Analysis - By Reason:
|
| 13. |
RA-13 - RMA Listing - Closed Prematurely:
|
|
|